To restore an old photo, make a good digital copy first, then repair the scratches, creases and fading on that copy, never on the print itself. An AI photo restorer can repair the damage and add colour in one step, while a skilled retoucher is still the right choice for a badly damaged or irreplaceable heirloom.
This guide covers how to look after the print, how to copy it well, how to restore and colourise it, and when to hand it to a professional.
First, Protect the Original
The print is the real record. Whatever you do on screen can be undone; damage to the paper cannot.
- Handle prints by the edges, with clean, dry hands.
- Do not force a curled or cracked print flat, tape a tear, or clean the surface with water or household products.
- If a print is stuck to glass, mouldy or flaking, do not pull it free. Ask a photograph conservator for advice first.
- Keep the untouched scan as well as every restored version. Always edit a copy.
How to Make a Good Copy
The restorer can only work with what it can see, so a clean copy matters more than any setting.
With a scanner
- A flatbed scanner gives the most even, glare-free copy.
- 600 dots per inch is a sensible setting for standard prints. Use a higher setting for small prints you plan to enlarge.
- Scan in colour, even for black-and-white prints. It keeps the warm tone of the paper, and you can always remove colour later.
- Wipe the scanner glass first. Dust on the glass looks like damage on the photo.
- Save in a lossless format such as TIFF or PNG.
With a phone
- Take the print out of its frame or plastic sleeve if you can do so safely, because glass and plastic cause glare.
- Lay it flat in soft daylight near a window. Turn the flash off.
- Hold the phone straight above the print so the edges come out square, and fill the frame.
- Crop away the album page or frame before you upload.

How to Restore an Old Photo in the Studio
ideahits is a self-serve AI studio in the browser, so you do the restoring yourself. These are the steps.
- Make your copy with a scanner, or a straight-on phone photo without glare, and crop away the album page or frame.
- Upload it to the Photo restorer.
- Choose the colour setting. Keep as it is repairs the damage and keeps the photo's own black and white or faded colours. Add natural colour repairs the damage and adds believable colour.
- Run it. Scratches, creases, stains and fading are repaired, and faces and details are sharpened naturally. The people and the composition are kept as they are.
- Compare it with the original side by side. Look at faces, hands, writing and anything your family would recognise.
- Enlarge it for printing. Run the restored photo through the Image upscaler. At 4× the width and height become four times larger, up to 4096 pixels on the longest side. At 300 pixels per inch, that is a print of about 35 cm on its longest side.
- Save everything together: the scan, the restored version and the colour version, with clear names.
The token cost is shown before every run, and if a run fails its tokens come back. See pricing for monthly plans and one-off packs.

A Word on Colourising
Colour added by AI is a believable guess. It cannot know the real colour of a dress, a car or a front door. If you know the true colours from family memory or other photos, check whether the guess matches. If it does not, and the colour matters, keep the black-and-white version as the one you share.
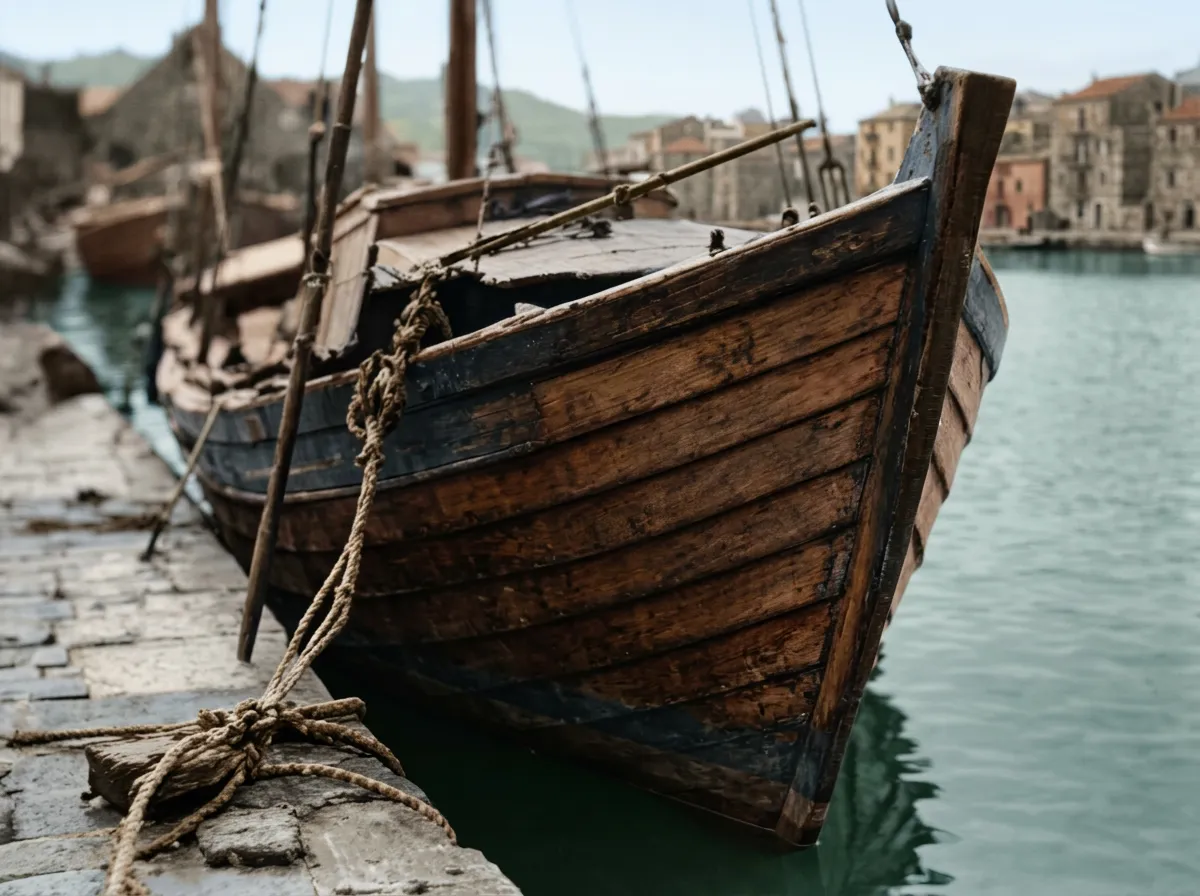
AI restoration also fills in detail it cannot see. Look at the background in the example above: the hazy shore behind the boat came back as a clear row of buildings. That is fine for a picture on the wall, but it is not a historical record. When you share a restored or colourised photo in a family history or a local archive, say so, and keep the original scan alongside it.
When to Use a Retoucher or Conservator Instead
- A conservator looks after the physical print: tears, mould, prints stuck to glass, flaking surfaces. Do this first if the print itself is at risk.
- A professional retoucher rebuilds the digital copy by hand. It is worth paying for when large parts of a face are missing, when the photo is the only picture of a person, or for a memorial print where every detail must be right. A retoucher can ask you what was there and rebuild it to match.
- Doing it by hand. Free editors such as GIMP have healing and clone tools for dust spots and small scratches, and levels or curves to bring back faded contrast. It is slow, but you decide every change.
- A mix. Let the AI repair the general damage, then fix anything it got wrong by hand or with a retoucher's help.
Common Mistakes
- Editing the only copy. Keep the untouched scan safe before you change anything.
- Glare and shadows in a phone photo. A glare patch hides detail, and nothing can restore what it cannot see.
- Leaving the frame or album page in. Crop to the photo itself.
- Scanning too small. A tiny scan limits how large you can print the result.
- Accepting the first result without checking faces. If someone no longer looks like themselves, keep the scan and try a retoucher.
- Throwing away the print once it is restored. The original is still the record.
Questions
Can AI restore a badly damaged photo?
It can repair scratches, creases, stains and fading, and sharpen faces naturally. Where large parts are missing, such as a torn corner across a face, the result is a guess, and a retoucher who can ask you what was there is the safer choice.
How do I colourise a black-and-white photo?
In the Photo restorer, choose Add natural colour. The damage is repaired and believable colour is added. Choose Keep as it is if you want the photo to stay black and white.
Should I scan or photograph old photos?
Scan if you can, because a flatbed gives an even, glare-free copy. A phone photo works too if you shoot straight on in soft daylight, without flash or glare, and crop away the frame.
Can I print a restored photo larger?
Yes. Run it through the Image upscaler at 4×, up to 4096 pixels on the longest side. At 300 pixels per inch, that is a print of about 35 cm on its longest side.